Enterprise Ethereum deployments typically require hours of manual configuration across genesis files, validator keys, and networking. According to Hyperledger Foundation's 2025 Annual Report, Besu adoption grew 38% year-over-year among enterprise users. This guide shows you how to create a fully configured Besu network with 4 validator nodes in under 2 minutes — no YAML editing required.
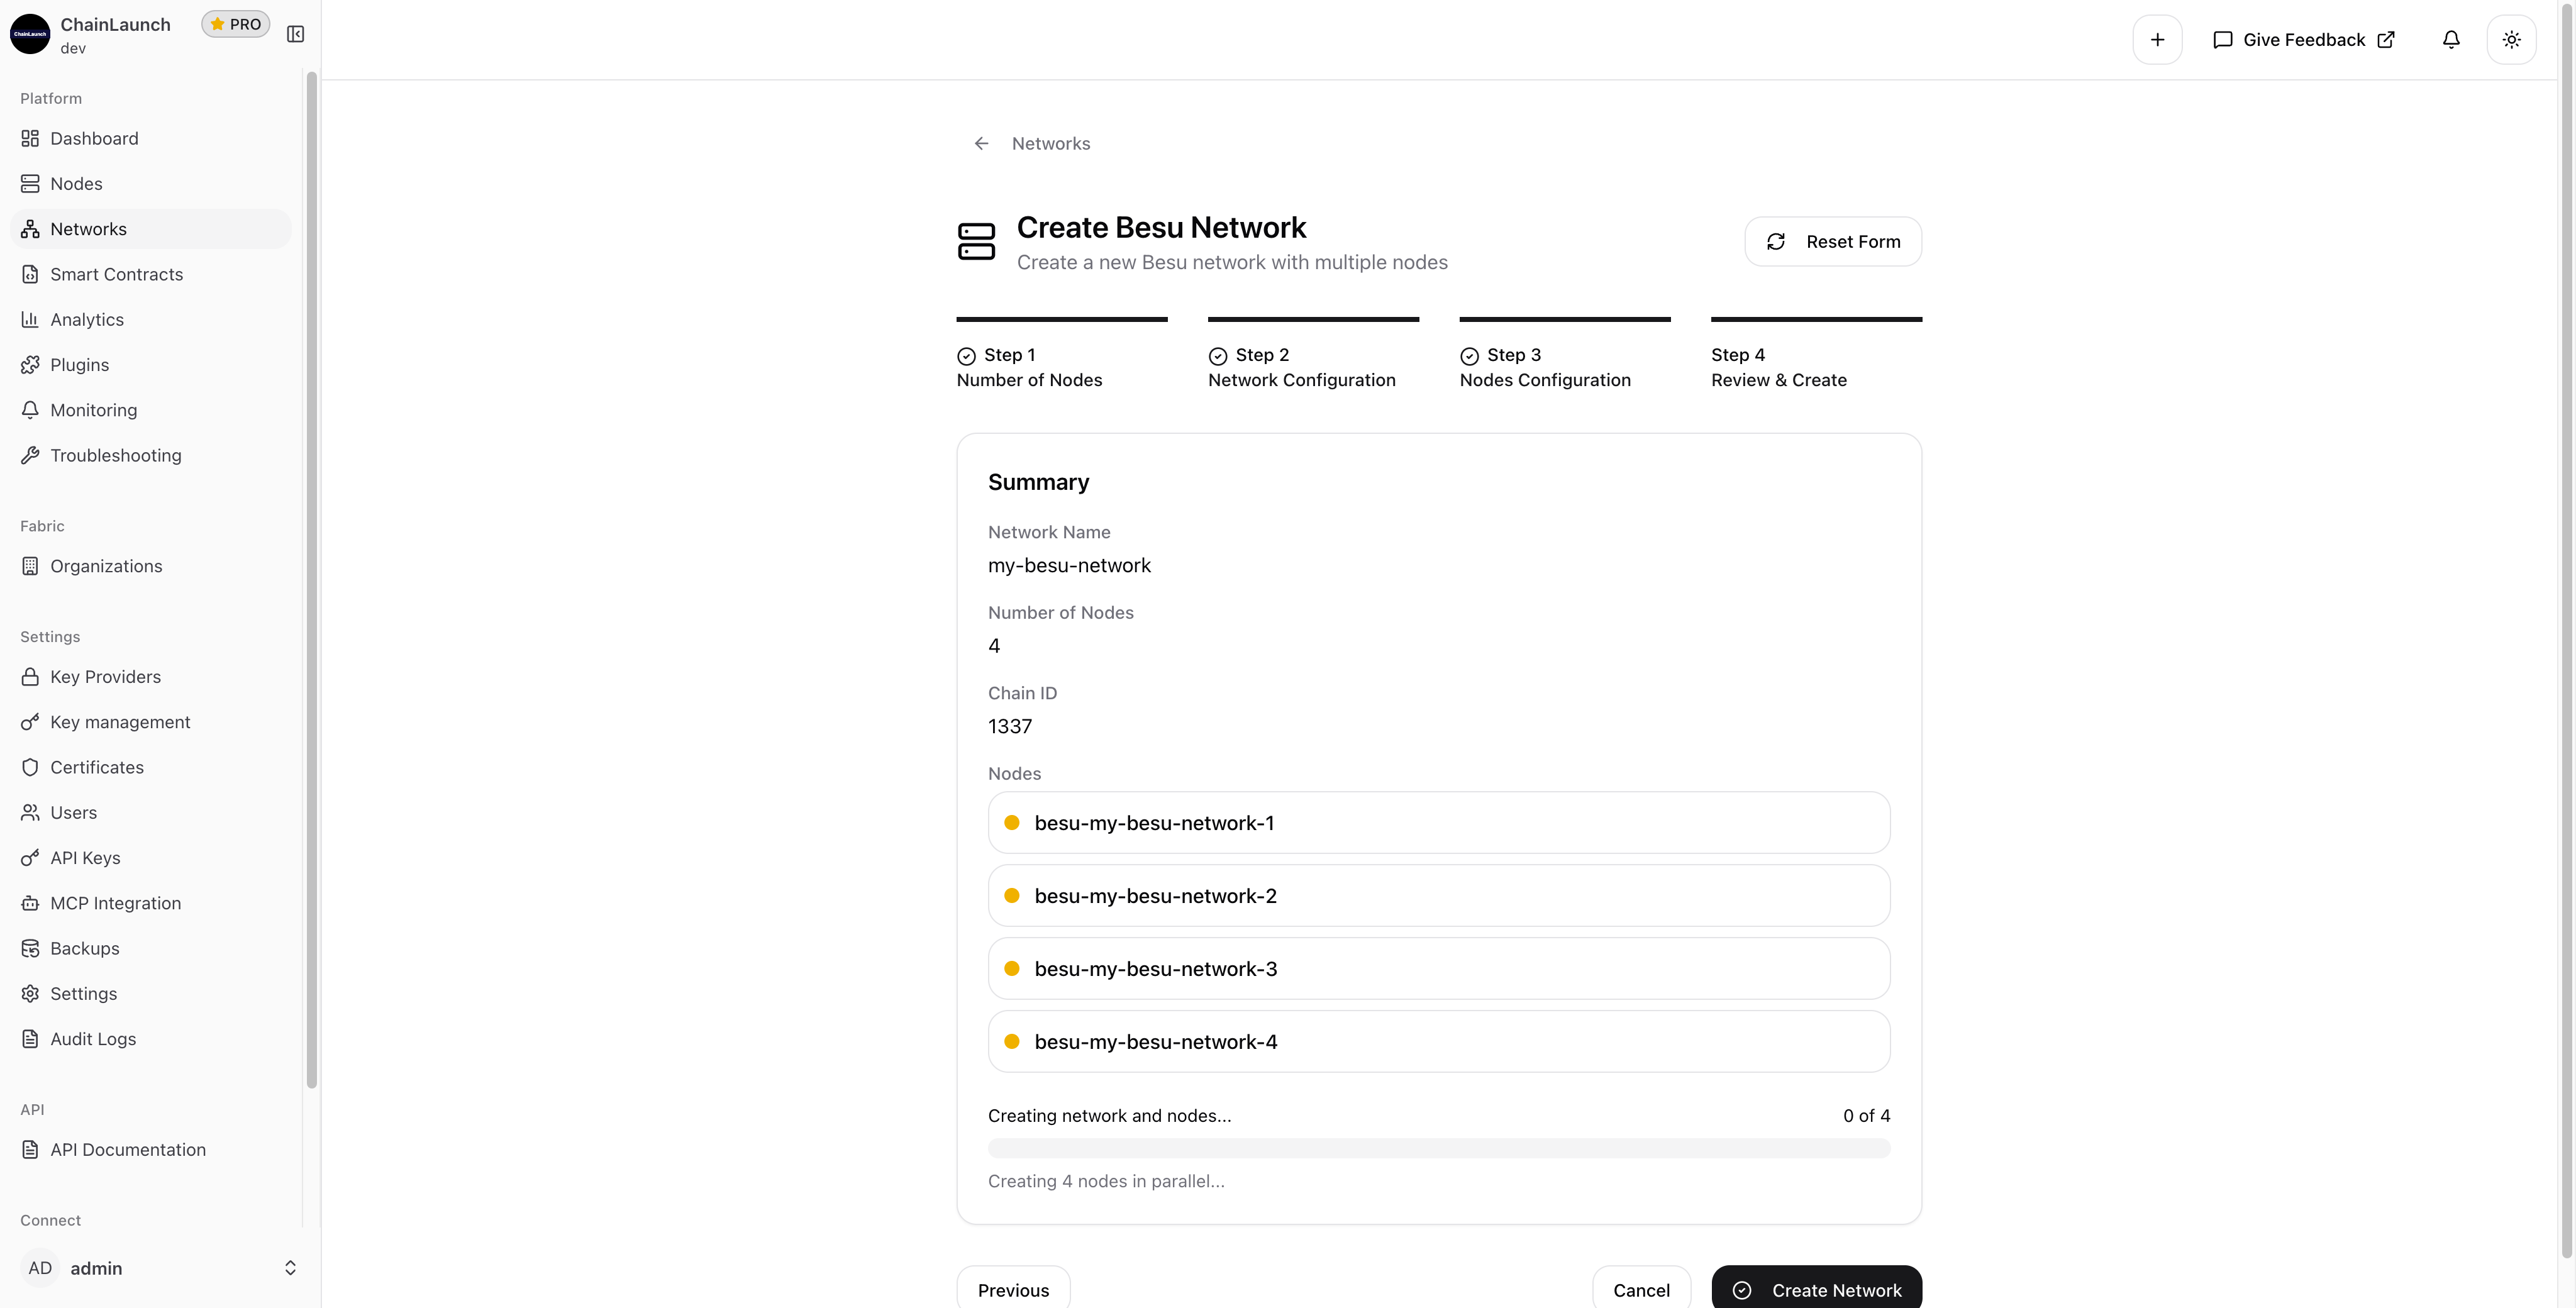
TL;DR: You can deploy a production-ready, 4-node Hyperledger Besu network with QBFT consensus in under 2 minutes using ChainLaunch's network wizard. The process handles validator key generation, genesis block creation, and node networking automatically — a task that traditionally takes hours of manual configuration.
This will start the dashboard at http://localhost:3100.
Free resource
5 QBFT Settings That Make or Break Your Besu Network
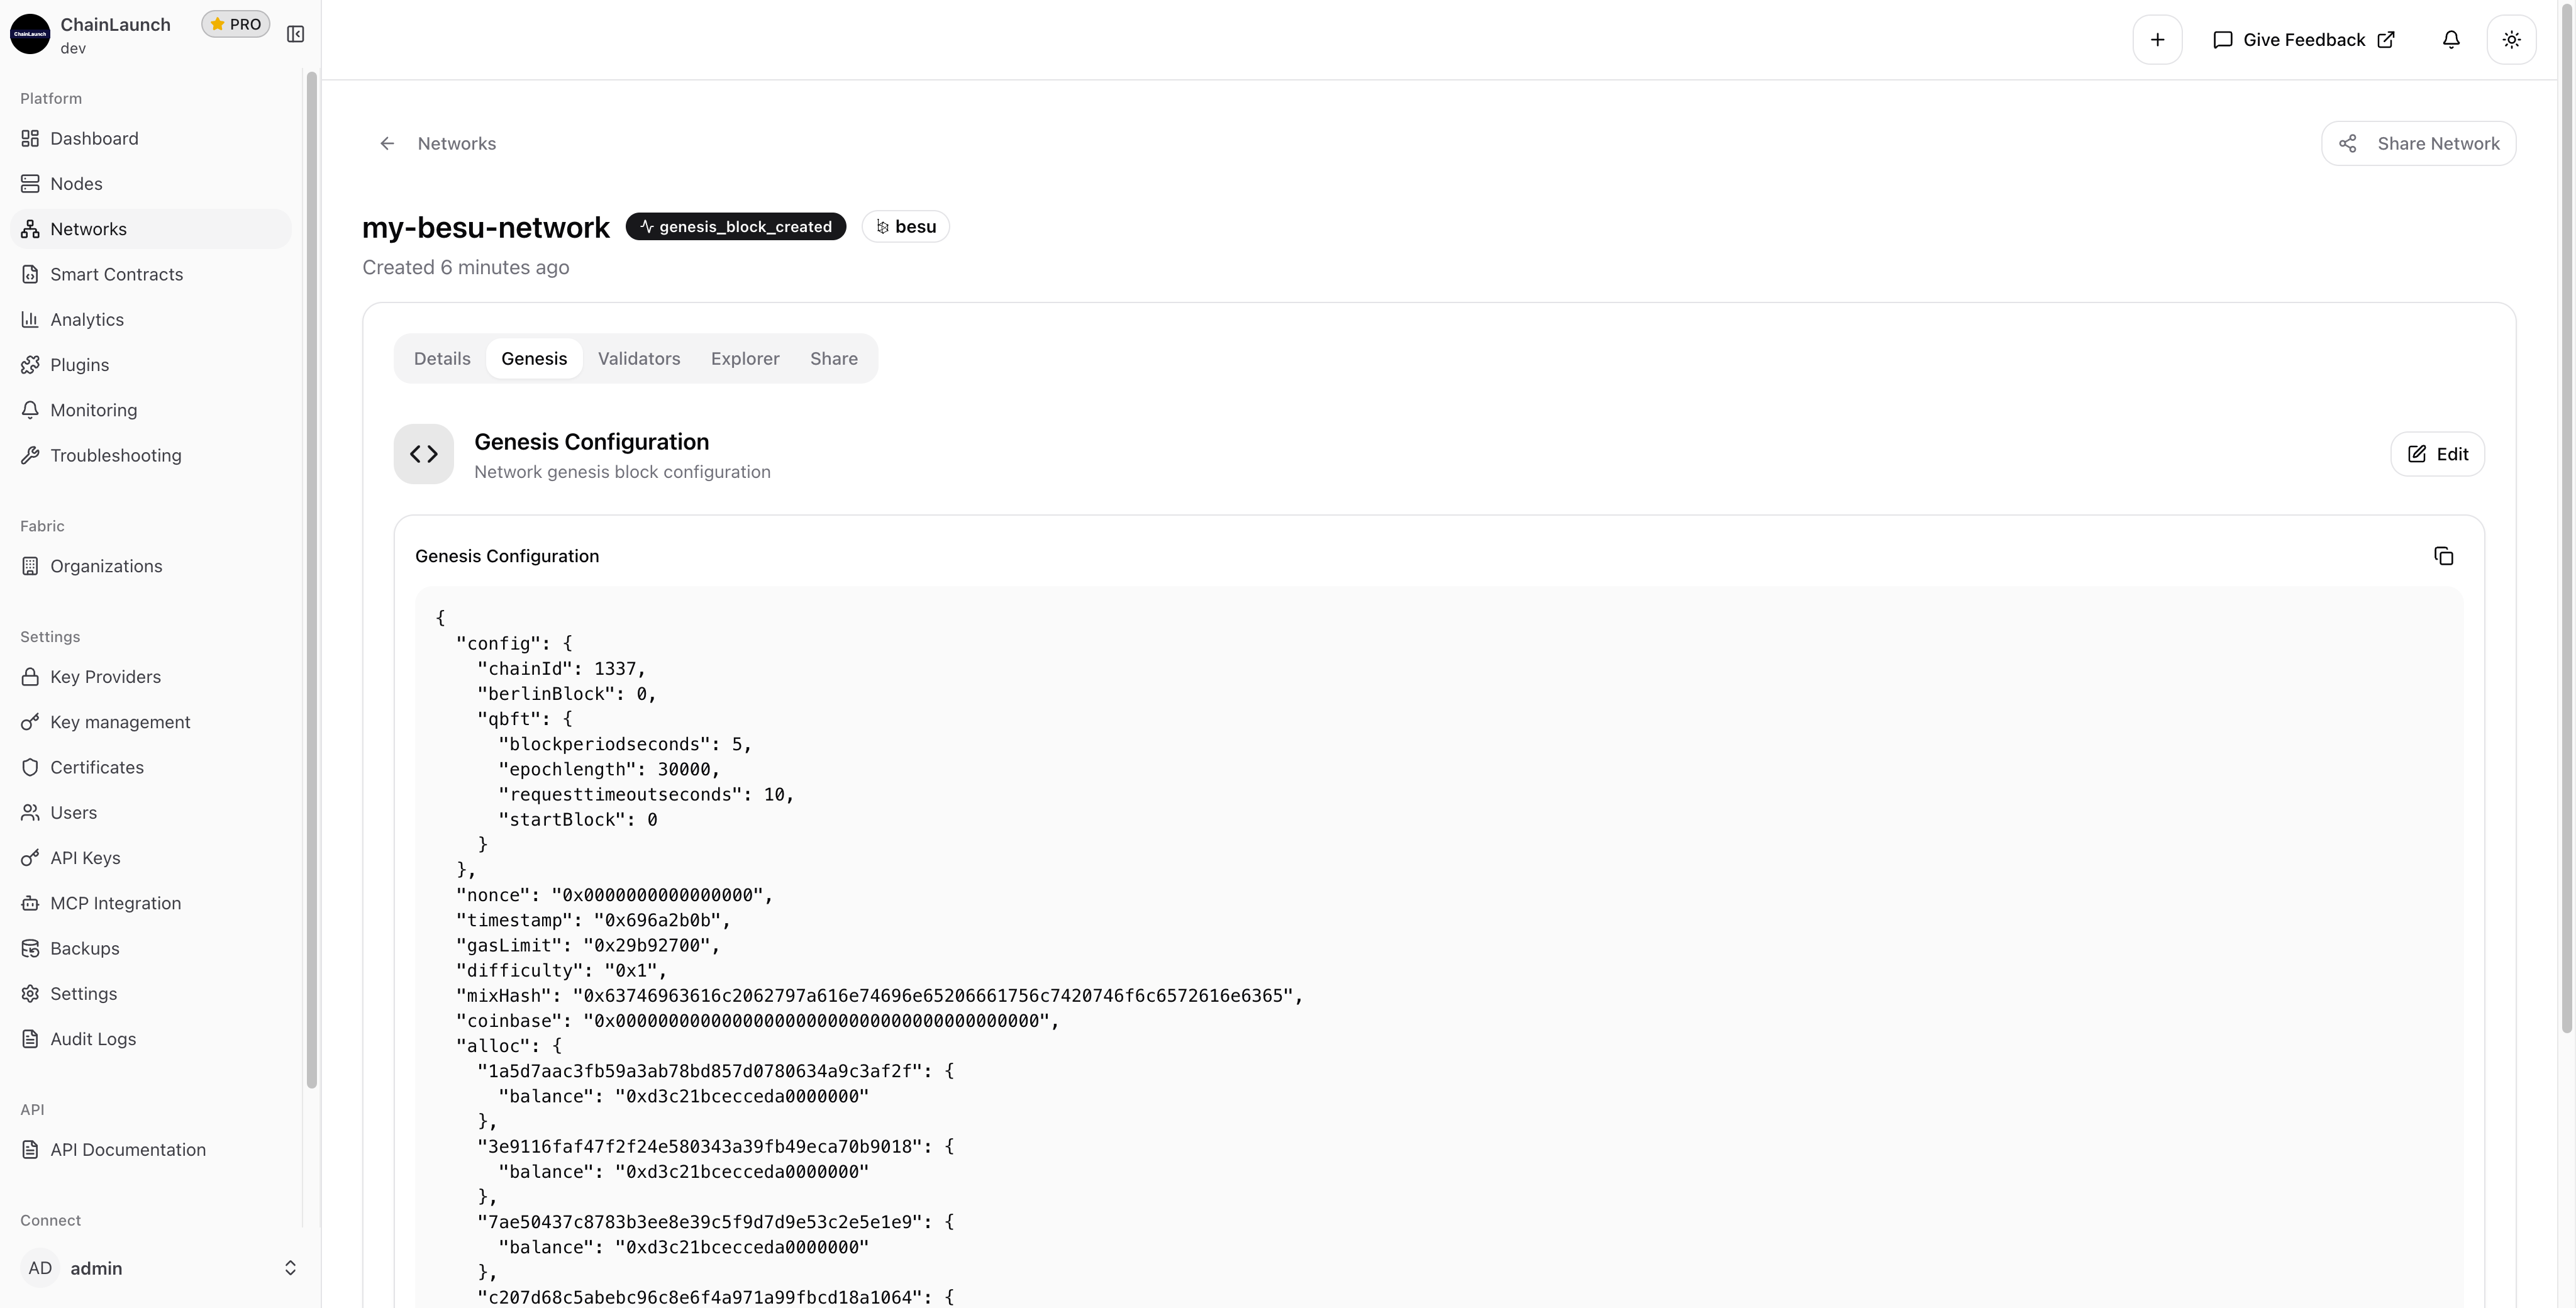
Genesis config template + validator key setup guide. Includes the exact block time, epoch length, and gas settings we use for enterprise Besu deployments.
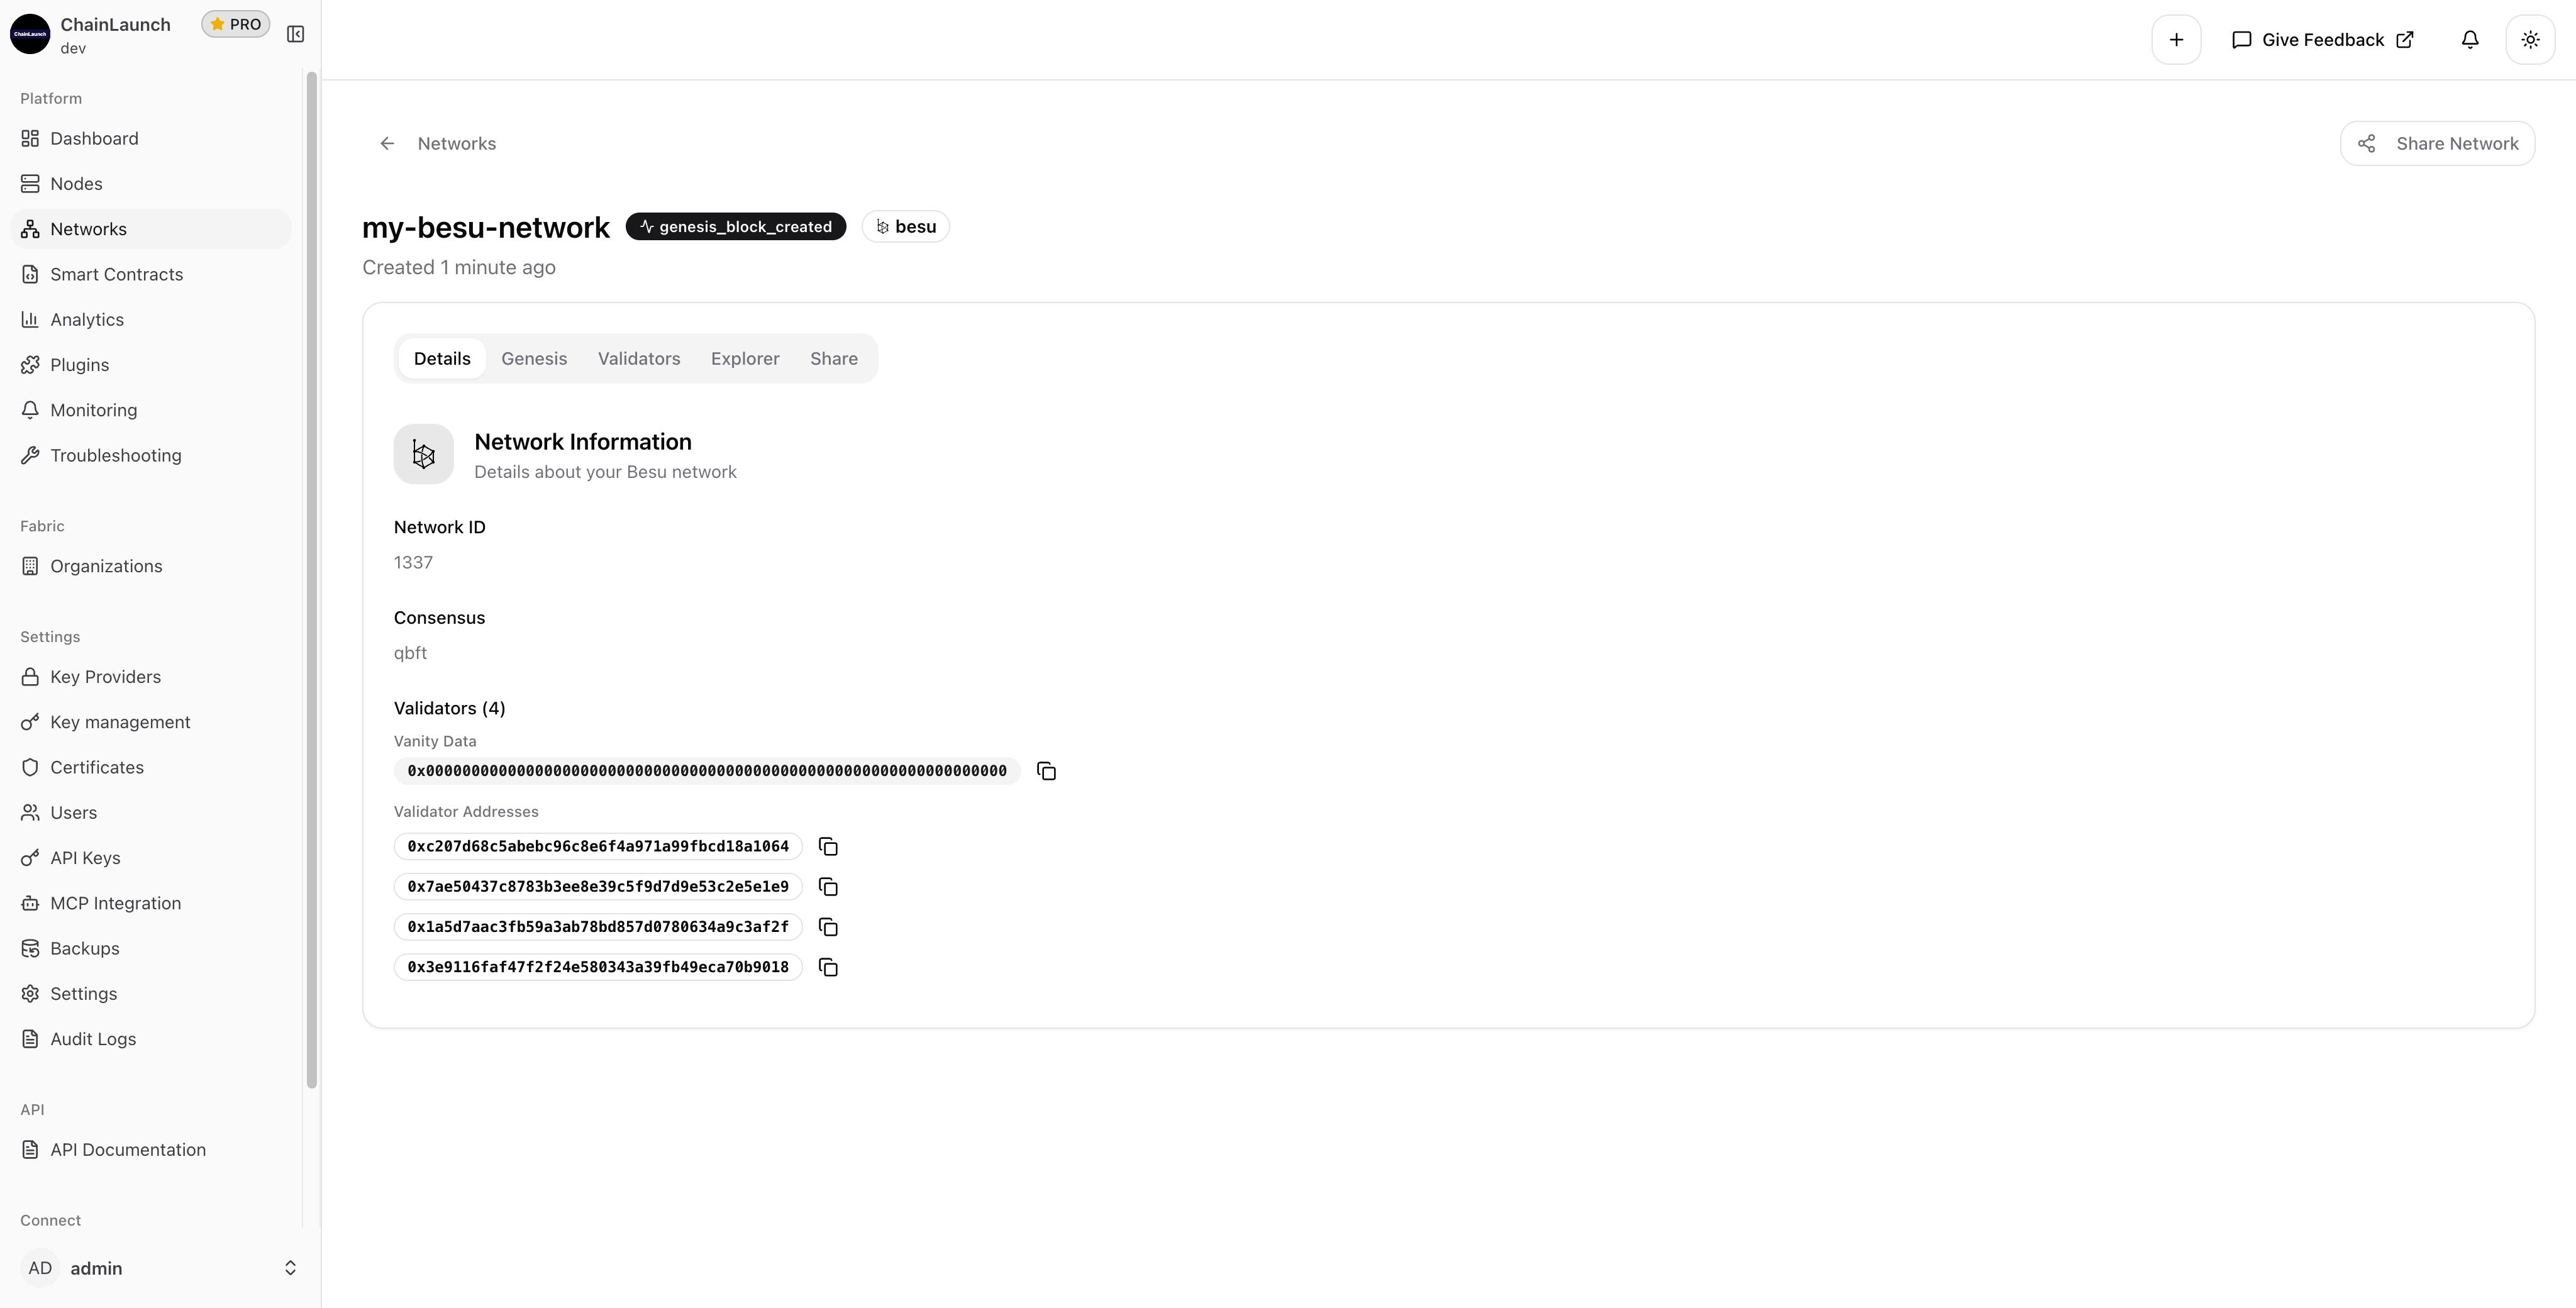
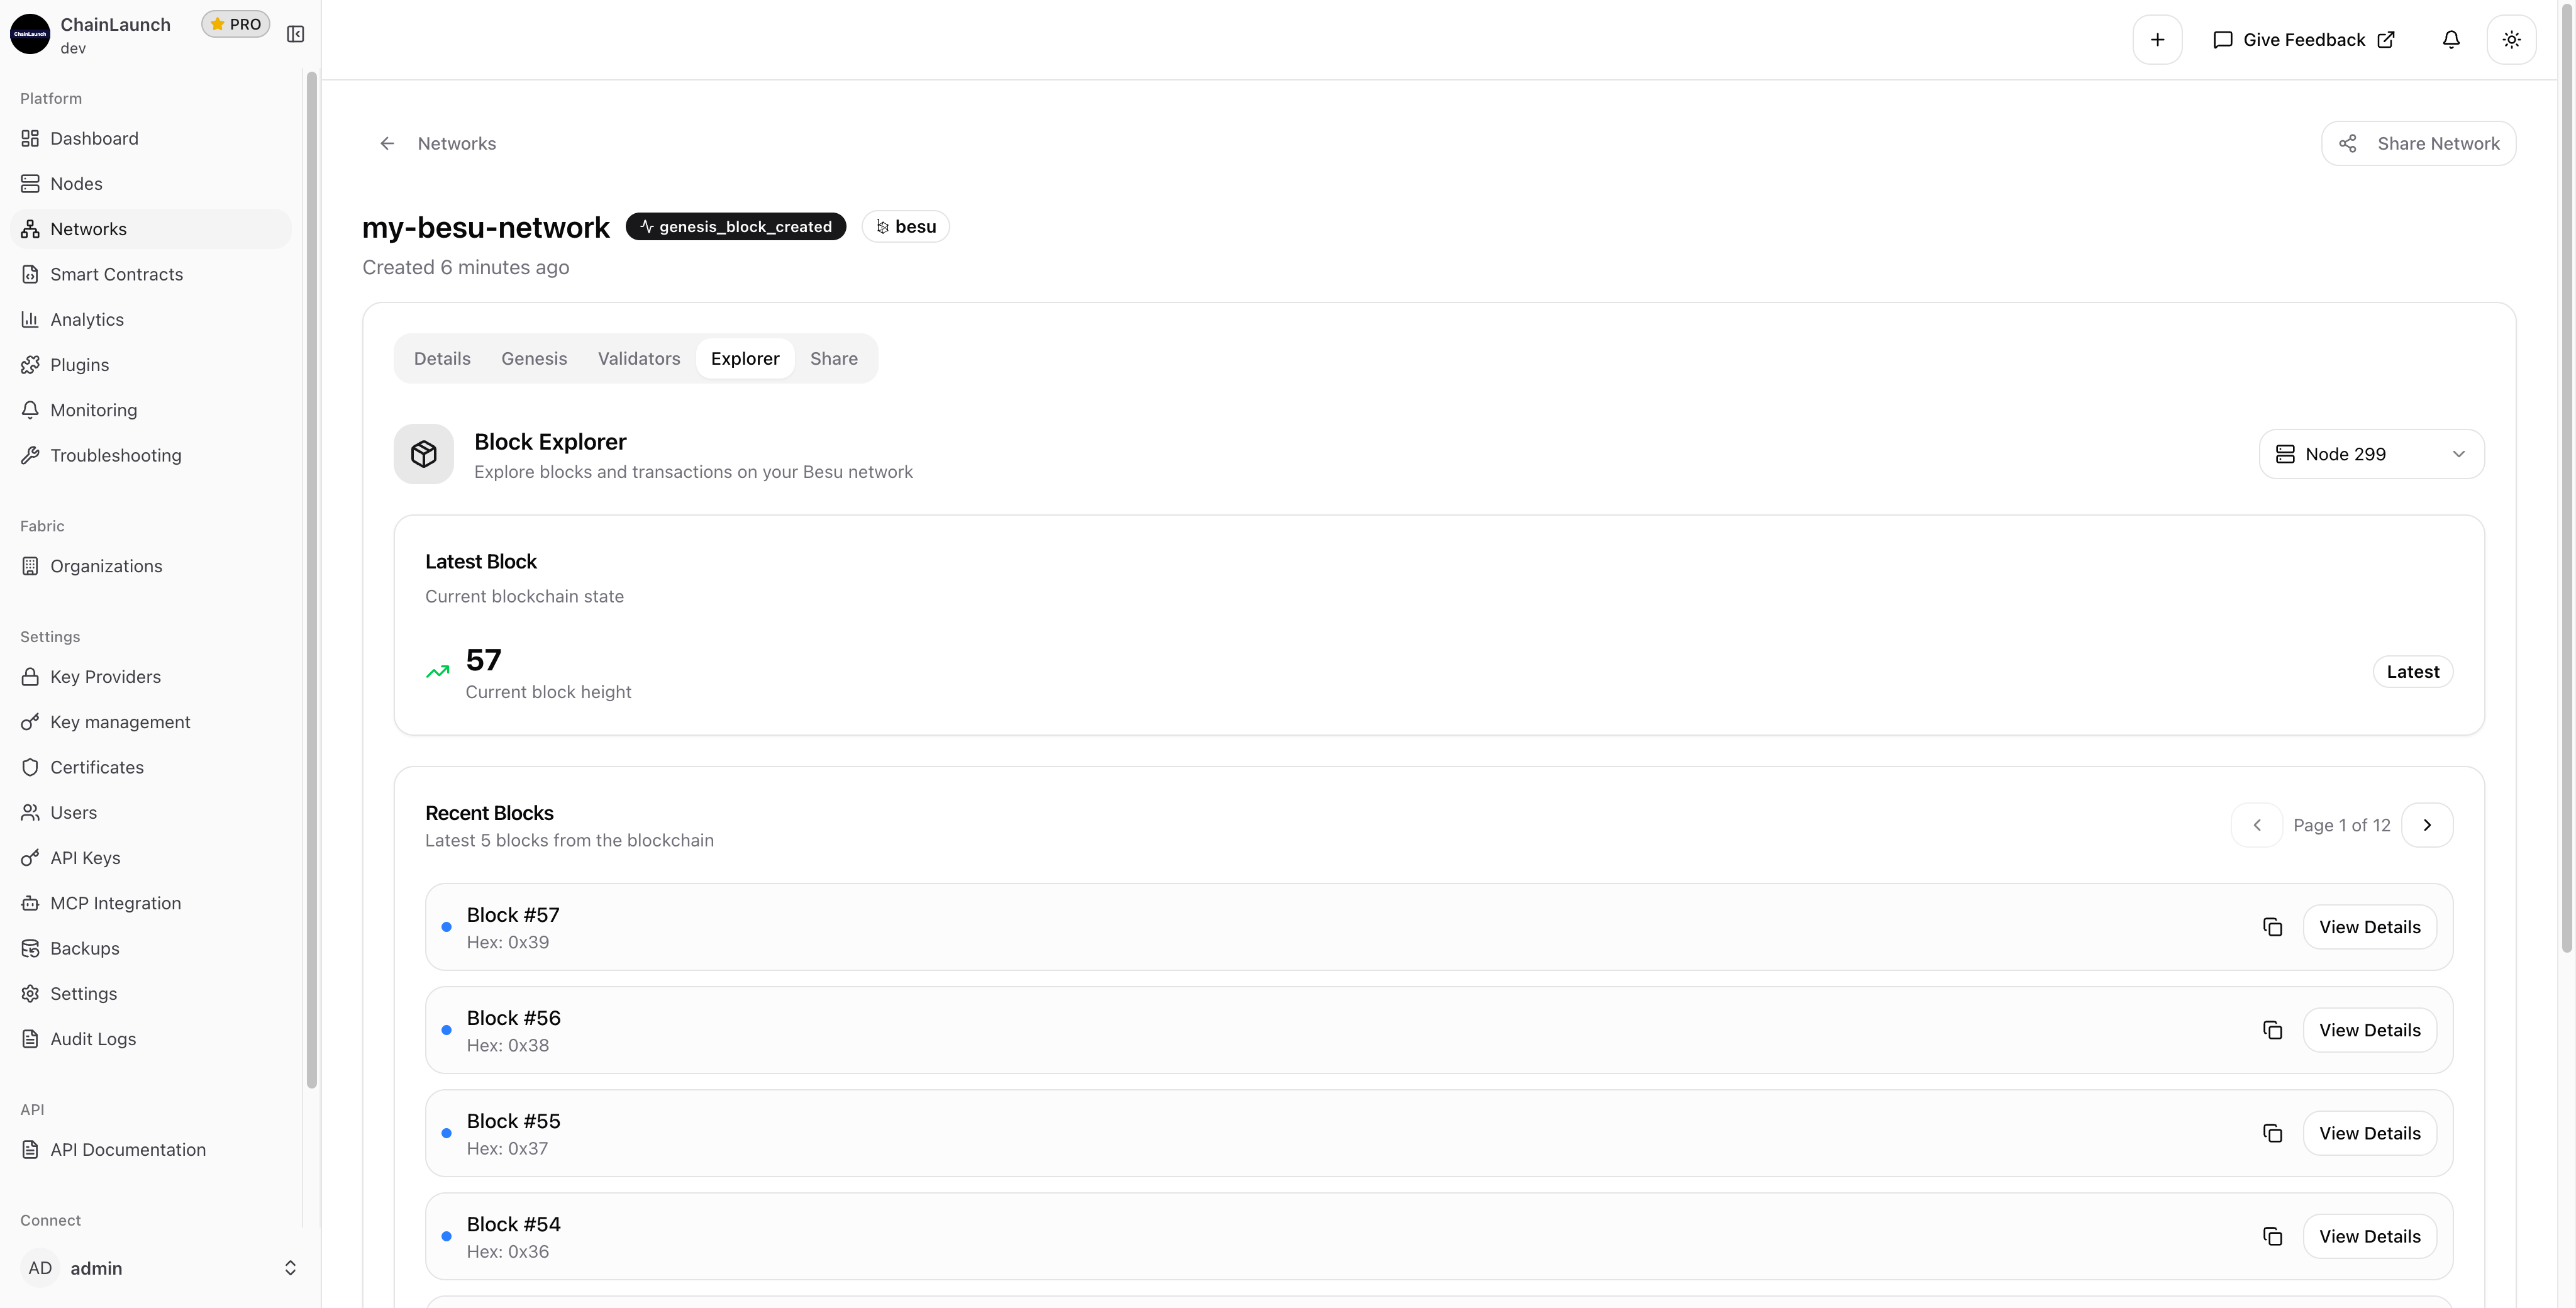
Once complete, you're redirected to your new network's detail page:
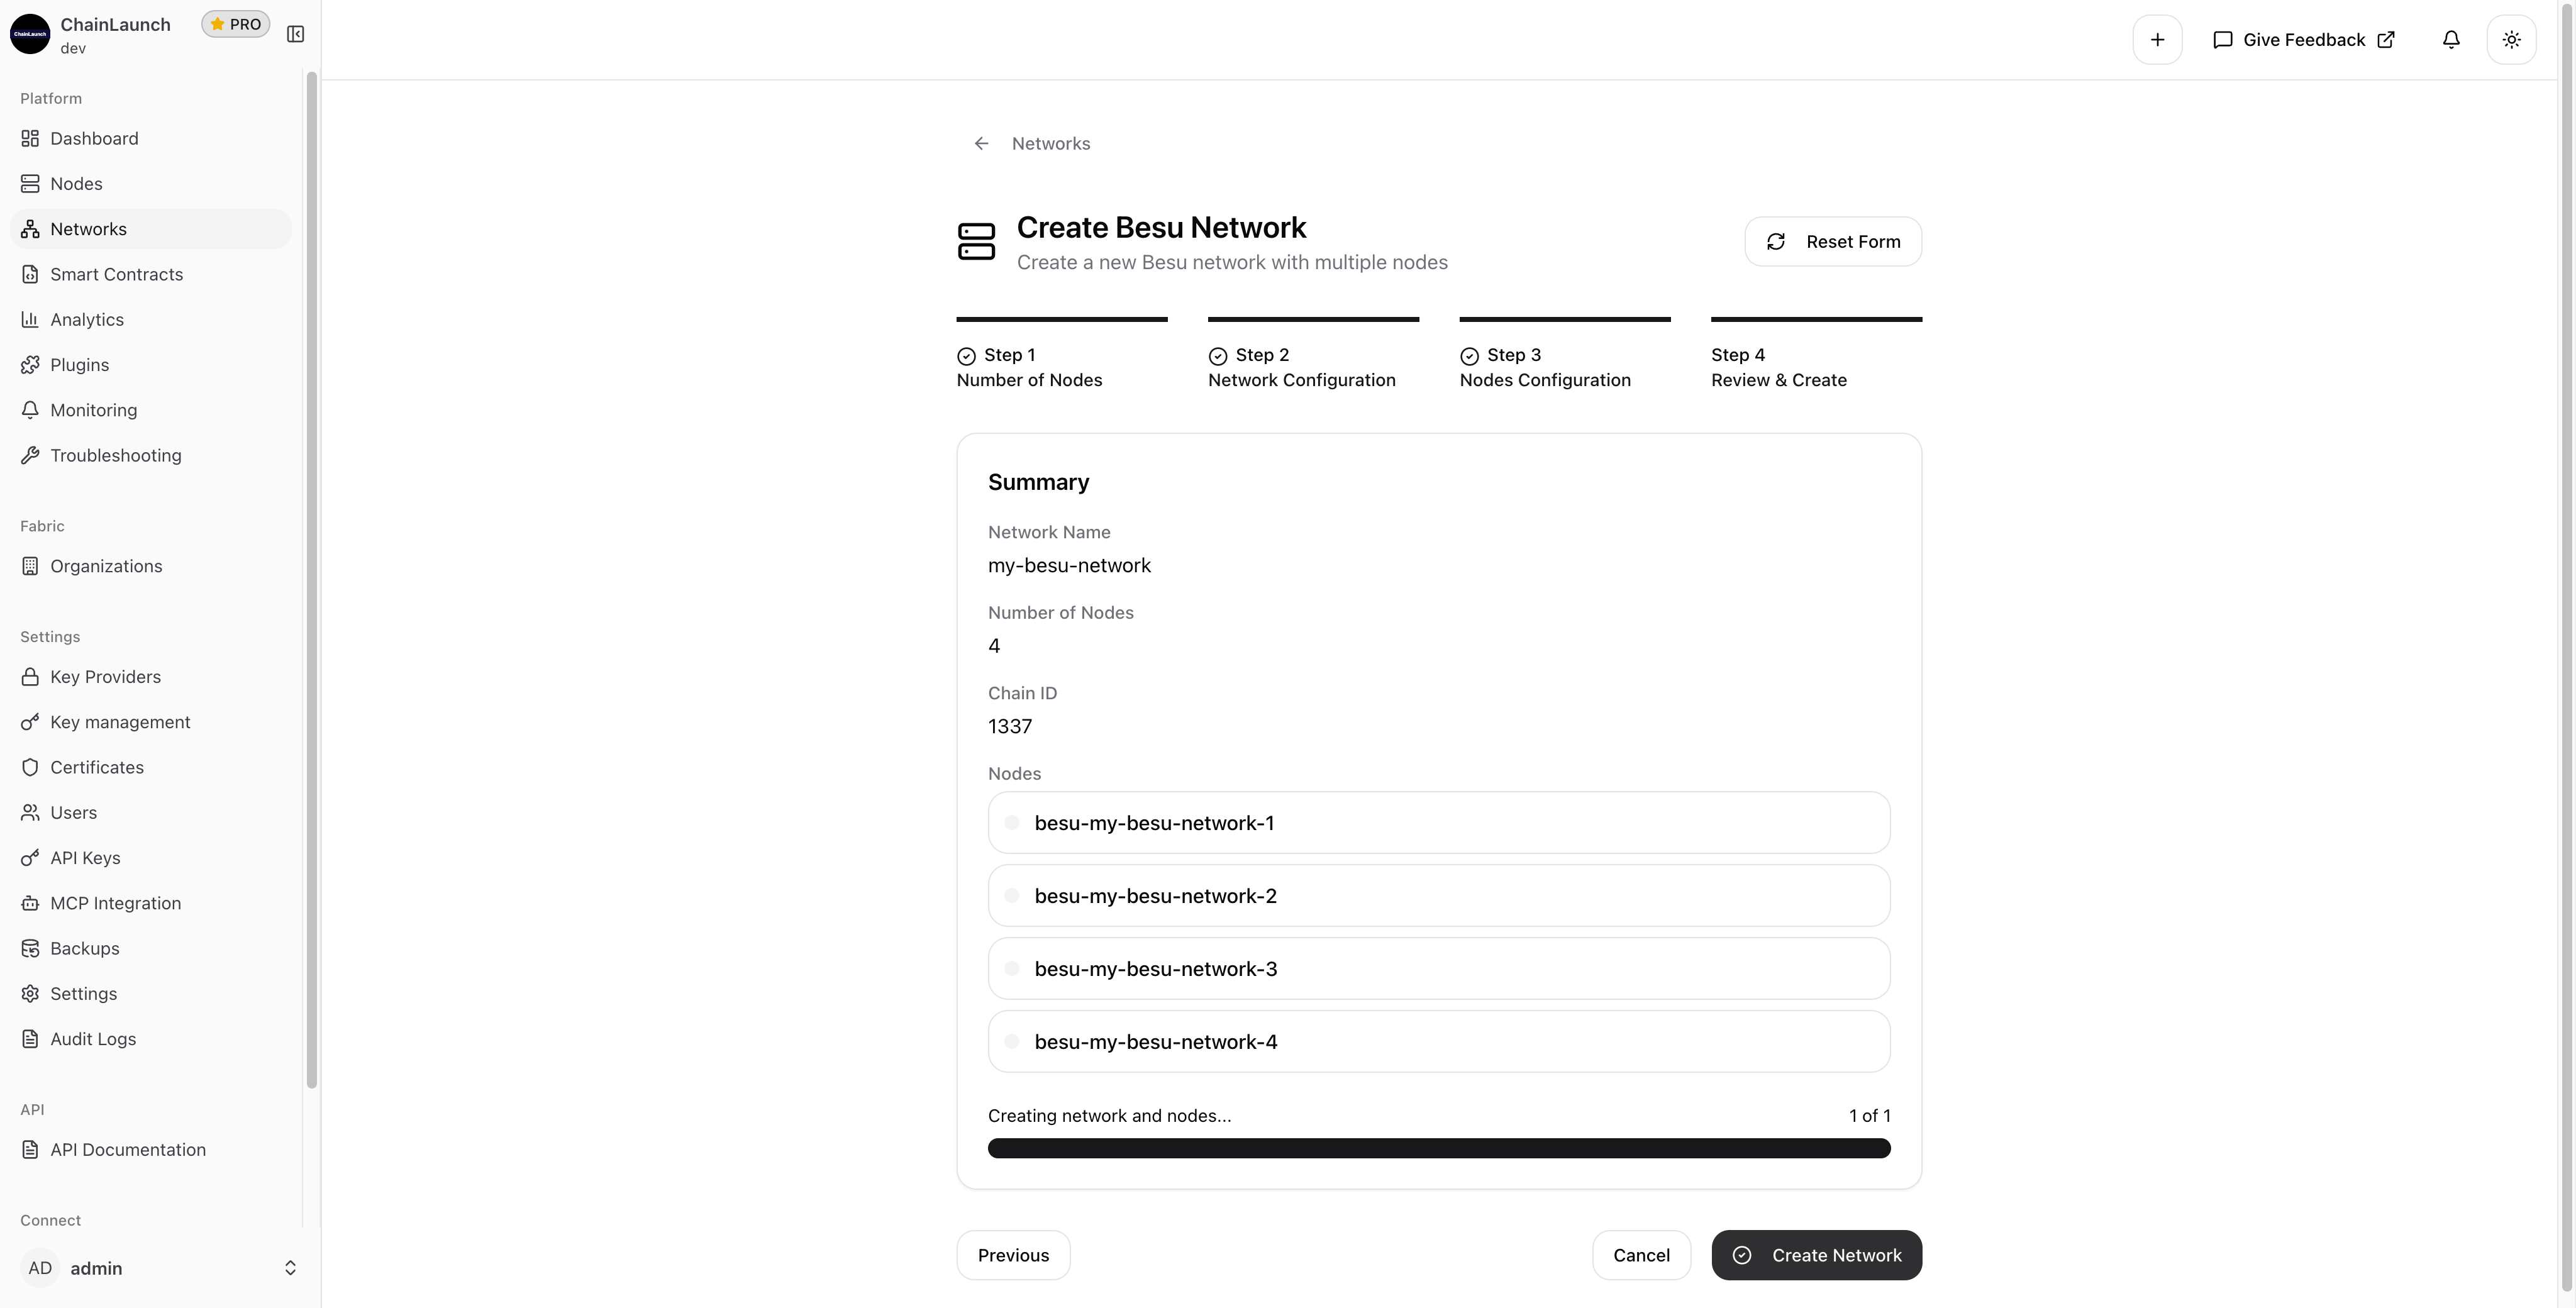
Your Besu network is now ready with:
Genesis block created status
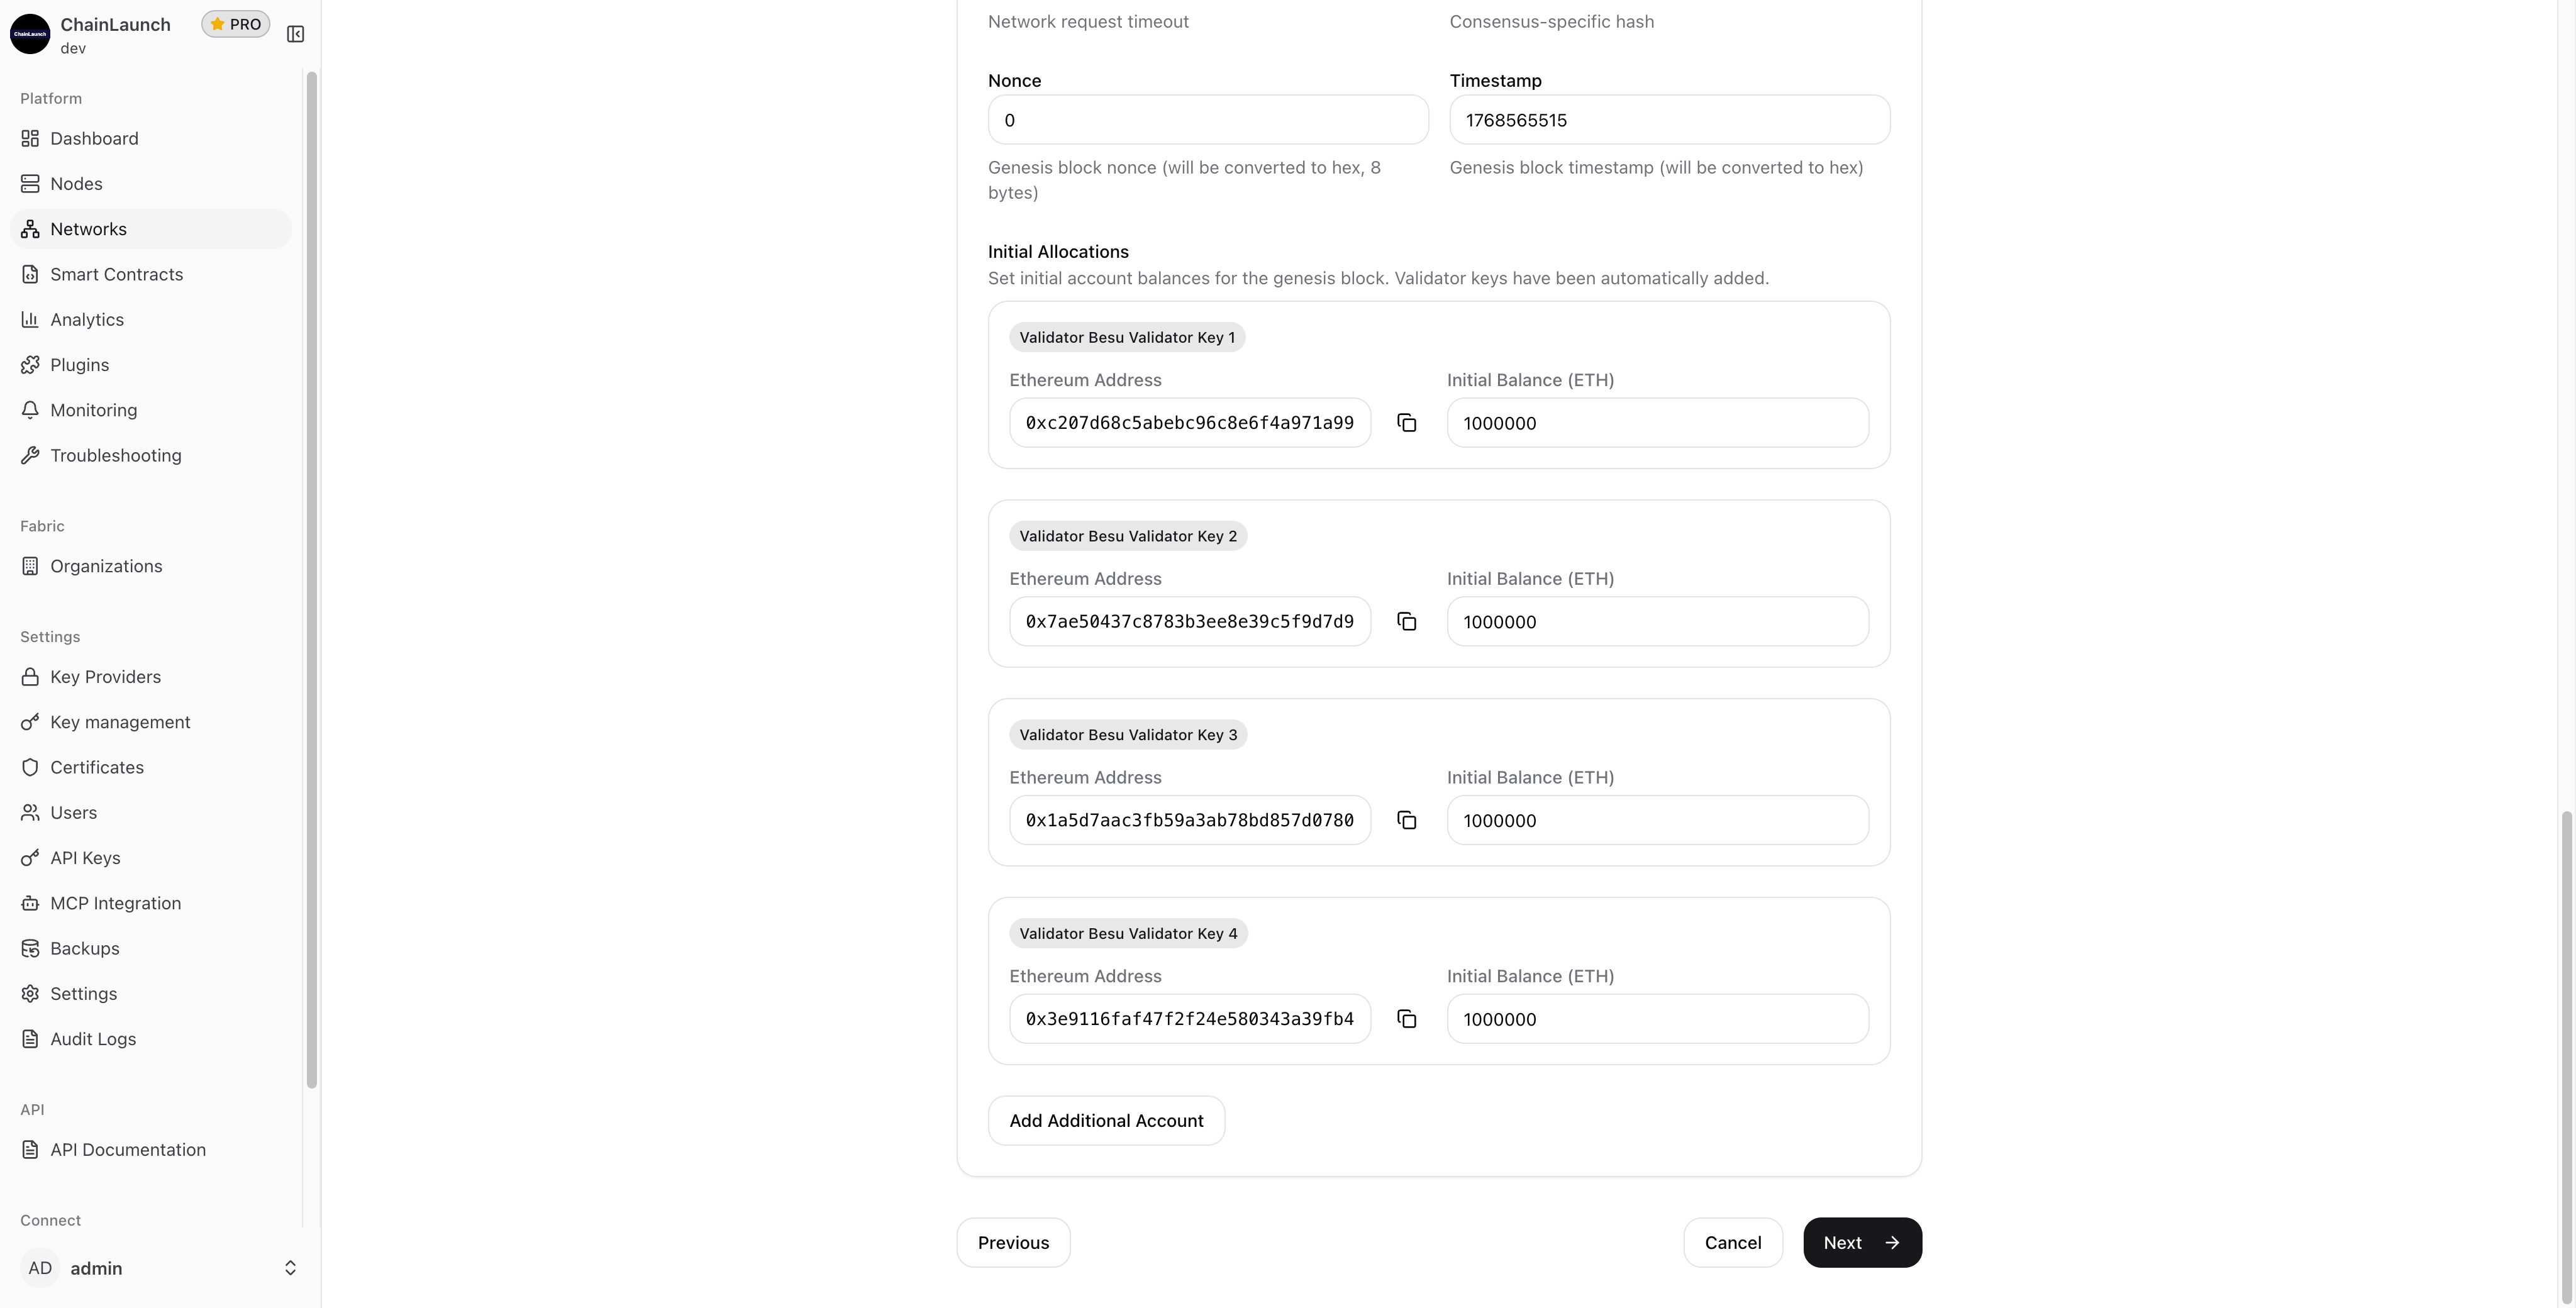
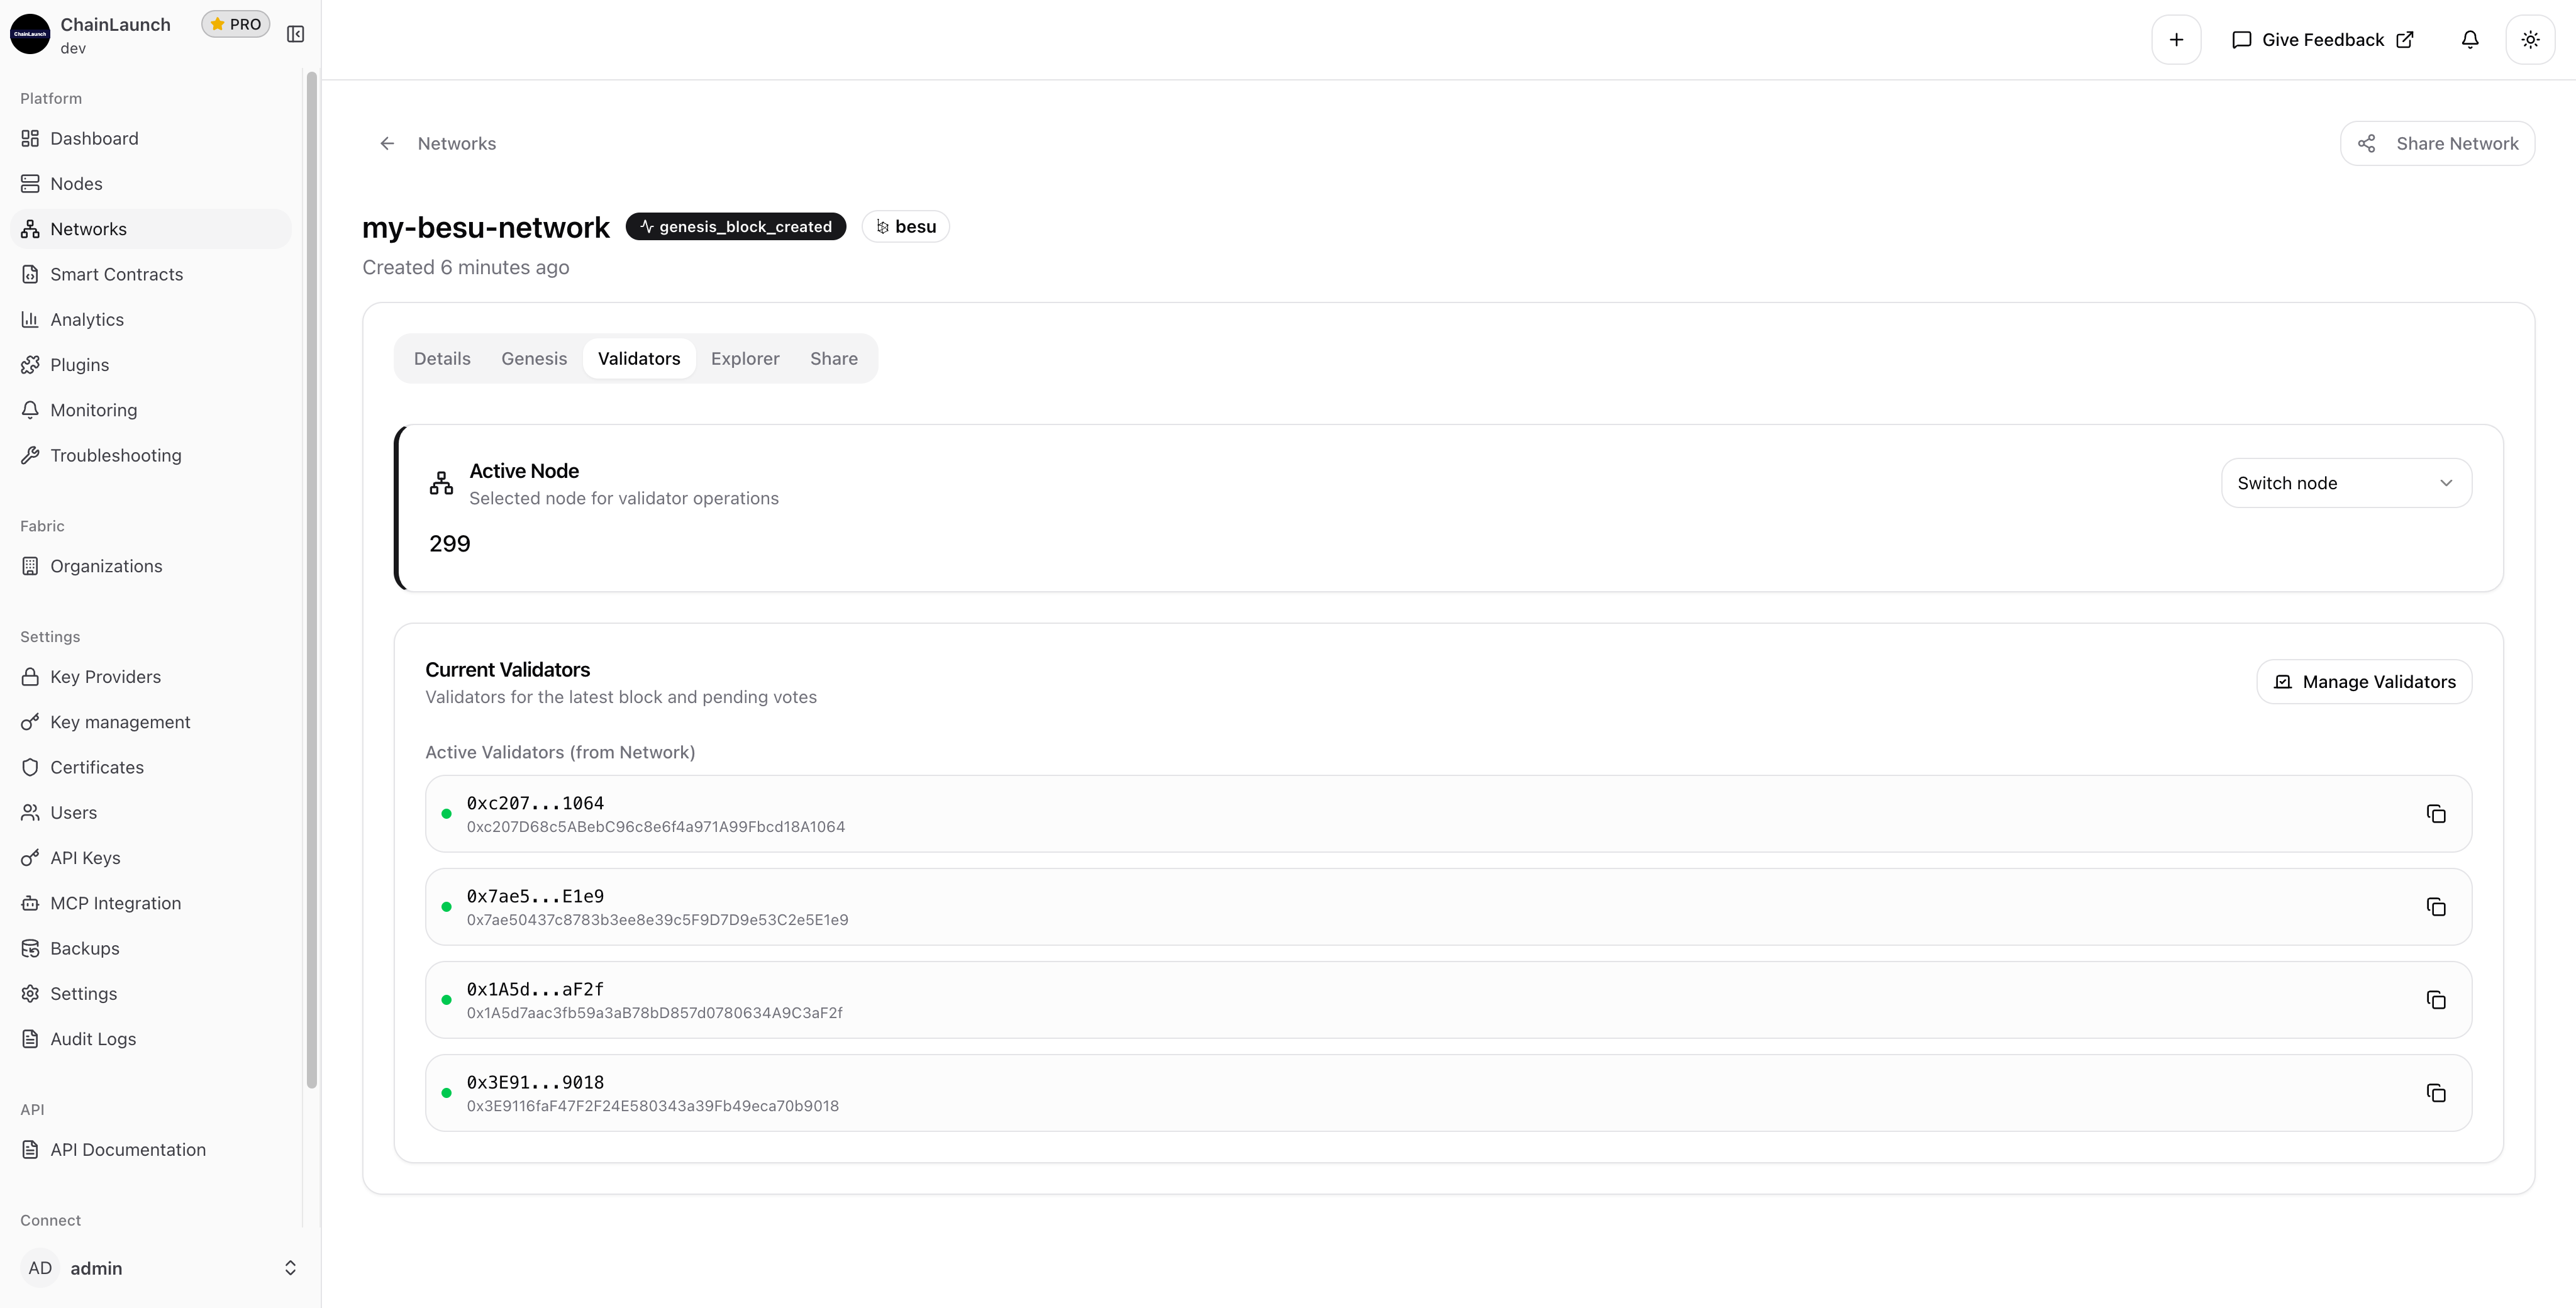
4 validator addresses configured
QBFT consensus active
Network ID 1337 assigned
Free resource
5 QBFT Settings That Make or Break Your Besu Network
Genesis config template + validator key setup guide. Includes the exact block time, epoch length, and gas settings we use for enterprise Besu deployments.
Use Hardhat, Truffle, or Foundry to deploy contracts to your network. If you're working with Hyperledger Fabric instead, check out our guide on deploying chaincodes with AI assistance.
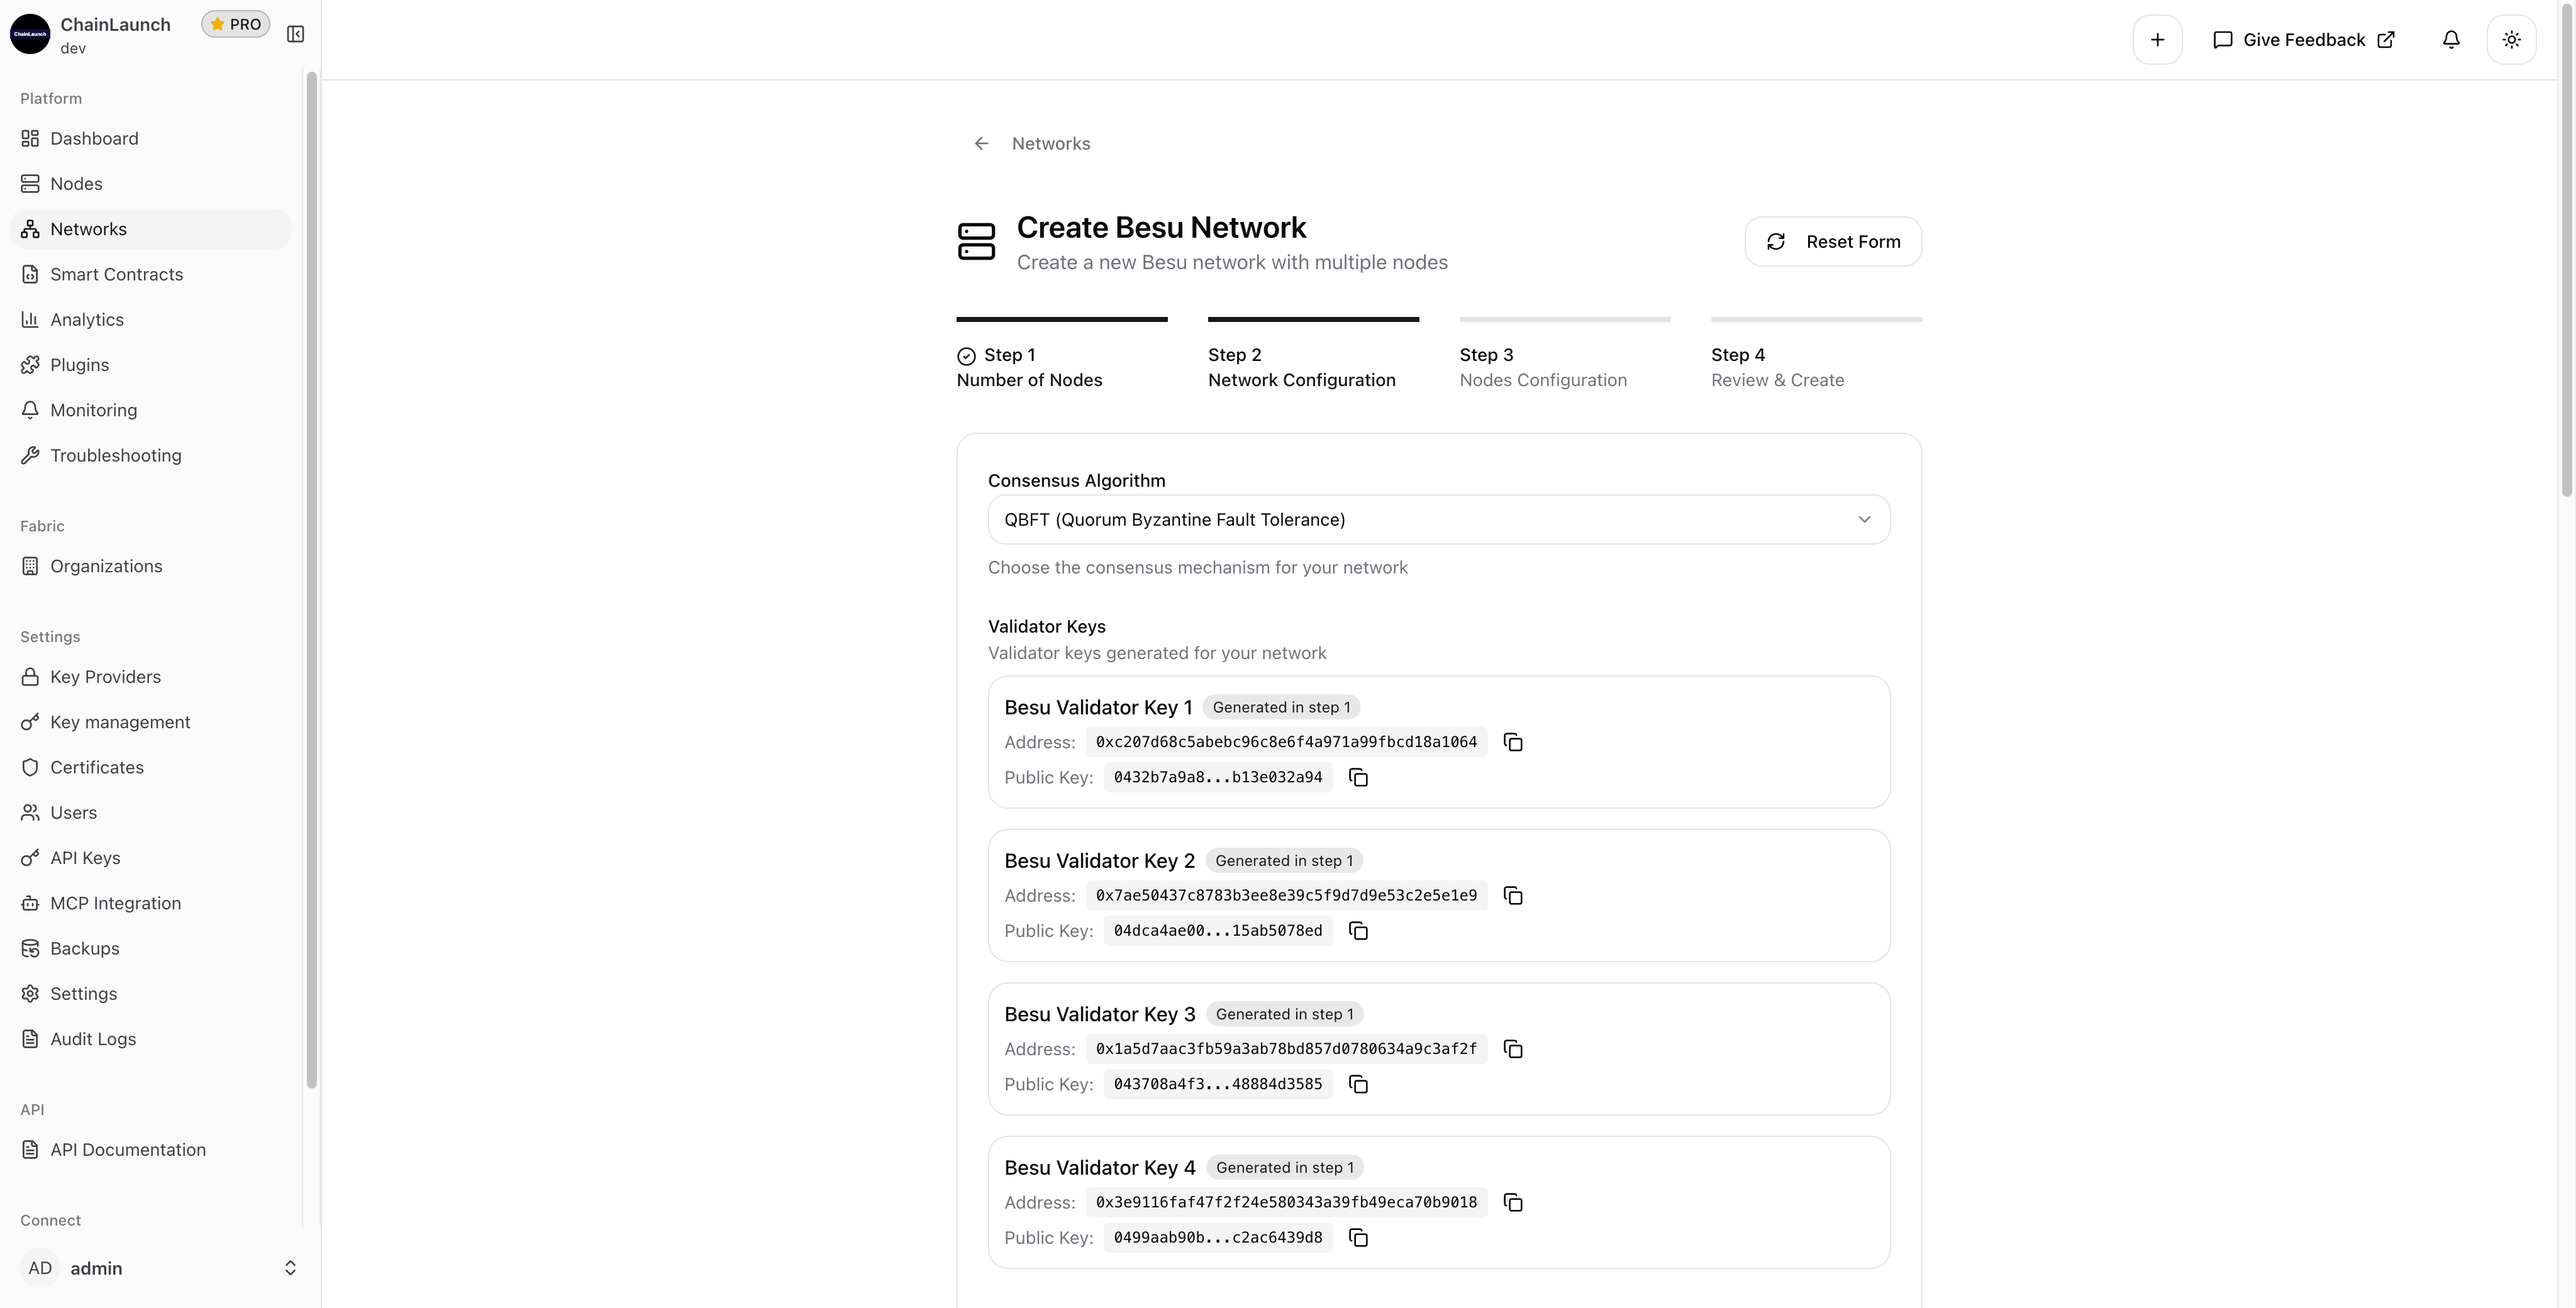
ChainLaunch uses QBFT (Quorum Byzantine Fault Tolerance) by default because it offers:
Immediate finality: Transactions are final once included in a block
Enterprise-grade: Designed for permissioned networks
Fault tolerant: Network continues with up to (n-1)/3 faulty nodes
Performance: High throughput with low latency
QBFT replaced IBFT 2.0 as the recommended consensus protocol for Hyperledger Besu permissioned networks. For a deeper comparison of consensus mechanisms across blockchain platforms, see our Hyperledger Fabric vs Besu comparison.
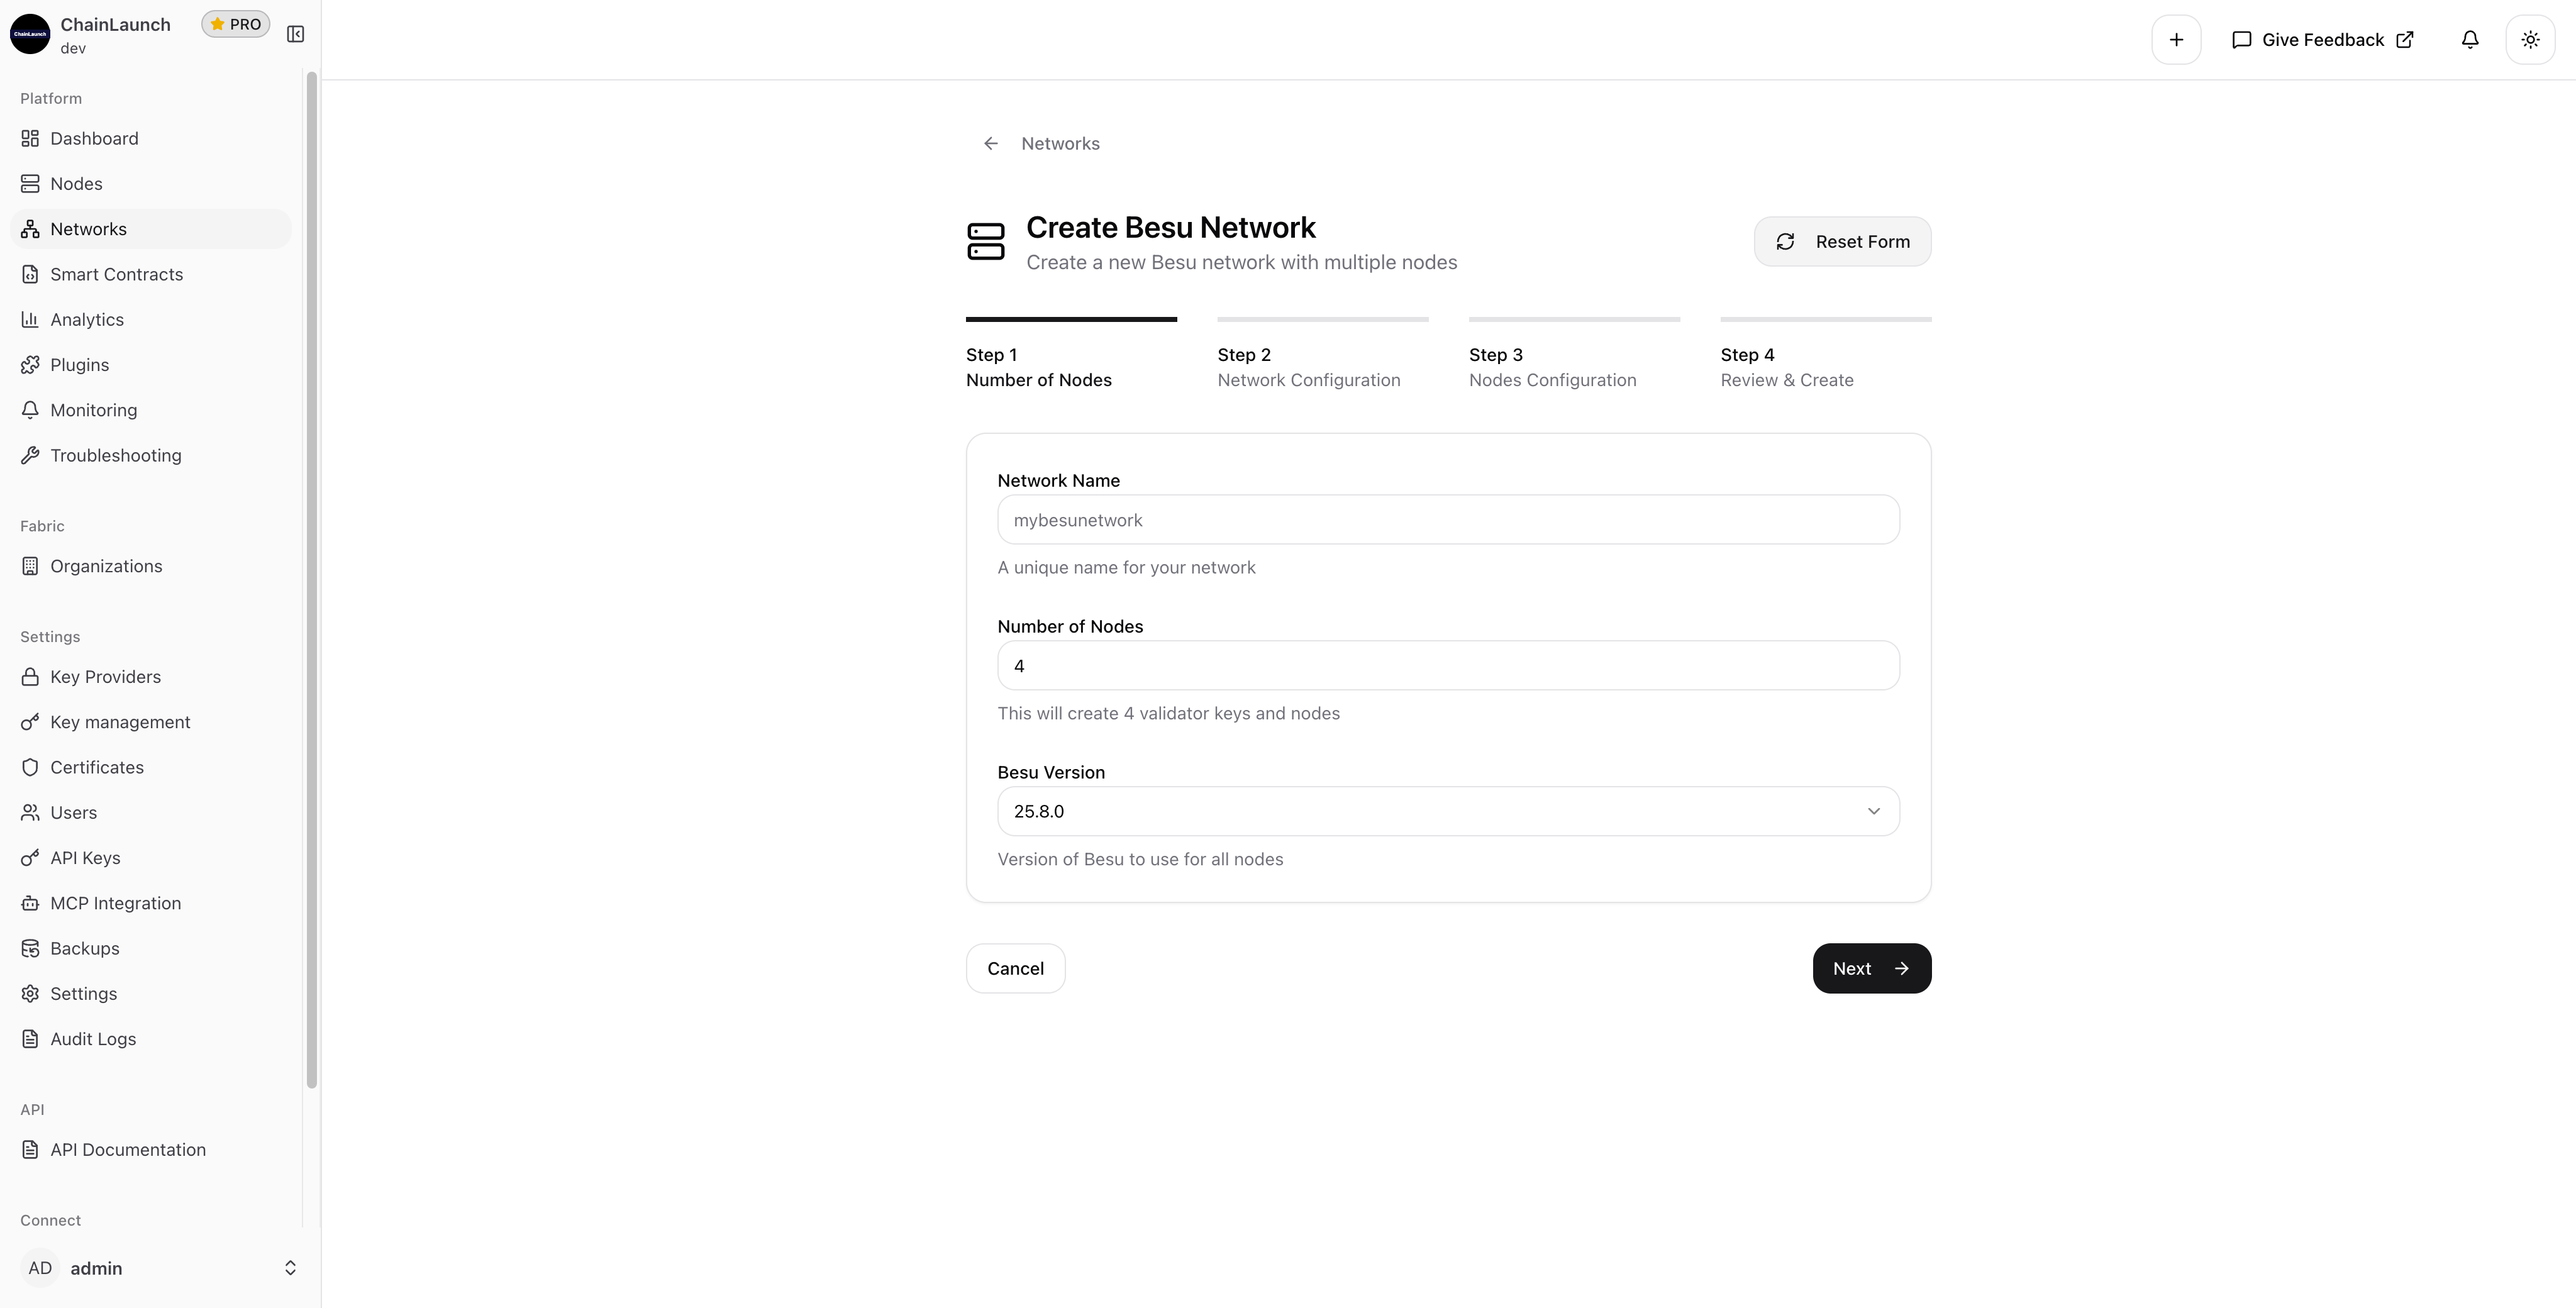
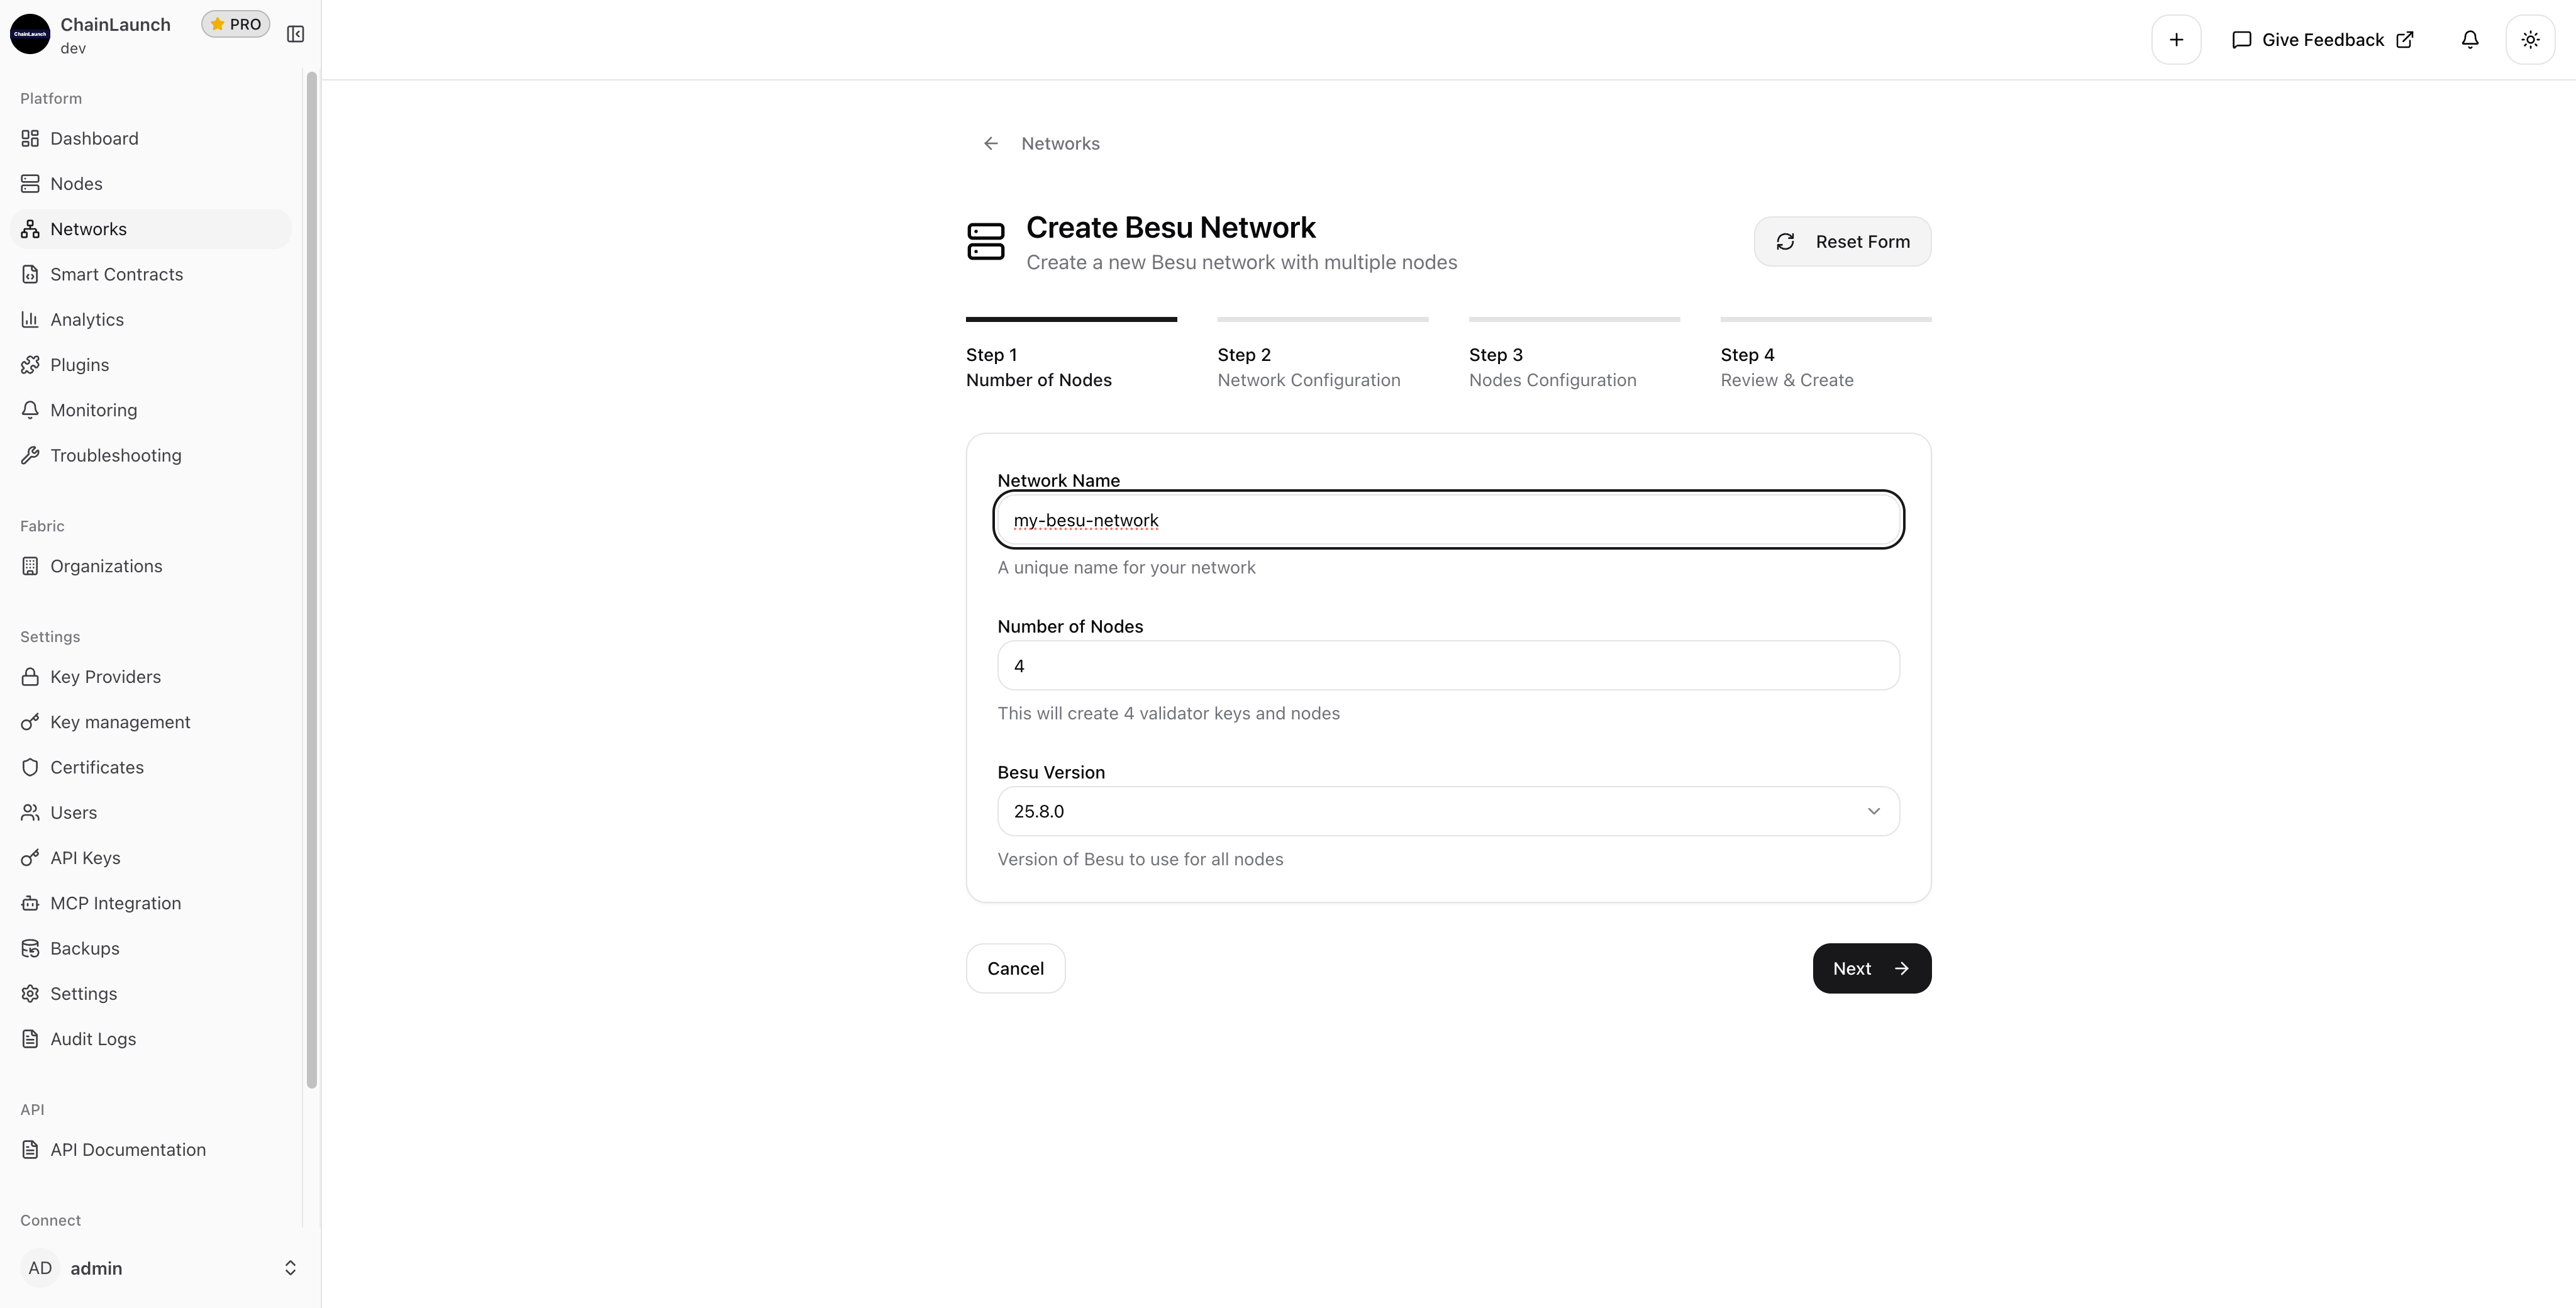
QBFT requires a minimum of 4 validators to tolerate 1 faulty node (the formula is 3f + 1, where f is the number of faults). Four nodes is the default in ChainLaunch and the recommended starting point for development and testing environments.
Yes. QBFT supports dynamic validator management through on-chain voting. You can add or remove validators from the Validators tab without restarting existing nodes. ChainLaunch handles the proposal and voting process through its UI.
Besu is an Ethereum-compatible client best suited for EVM-based smart contracts and token use cases. Fabric uses a channel-based architecture designed for complex permissioned workflows. We've written a detailed comparison of Fabric vs Besu covering performance, use cases, and architecture differences.
Manual Kubernetes setups for Besu typically involve writing Helm charts, configuring persistent volumes, managing secrets, and scripting genesis generation. ChainLaunch abstracts all of this into a guided wizard. For a cost and complexity breakdown, see our Kaleido vs ChainLaunch vs Kubernetes comparison.
What used to take hours of manual configuration now takes less than 2 minutes. The wizard handles validator key generation, genesis block creation, node configuration, and metrics setup automatically. With 4 validator nodes running QBFT consensus, you get immediate finality and Byzantine fault tolerance out of the box.
Whether you're building a proof of concept or preparing for production, this is the fastest path to a working Besu network. Pair it with ChainLaunch's AI-powered development tools to accelerate your smart contract workflow too.
Need help? Check out our documentation or reach out to our support team.
David Viejo is the founder of ChainLaunch and a Hyperledger Foundation contributor. He created the Bevel Operator Fabric project and has been building blockchain infrastructure tooling since 2020.
Free resource
5 QBFT Settings That Make or Break Your Besu Network
Genesis config template + validator key setup guide. Includes the exact block time, epoch length, and gas settings we use for enterprise Besu deployments.
We publish when we have something worth saying — tutorials, cost breakdowns, and production lessons from real deployments.
Work email only · Unsubscribe anytime
From the founder
Skip weeks of setup — get to production in minutes.
Most teams spend weeks on infrastructure before writing a single line of business logic. Book a call and I'll show you how ChainLaunch cuts that to minutes — and whether it's the right fit for your project.